I have great memories of wearing a large mans shirt over my clothes as a child – getting ready to finger paint!
So I was delighted when I recently found a recipe for Finger Paint that I really love! I’d tried a few before – but they didn’t seem to be quite the right consistency for traditional Finger Paint. The bonus is – that this particular recipe takes very few ingredients and is super easy!
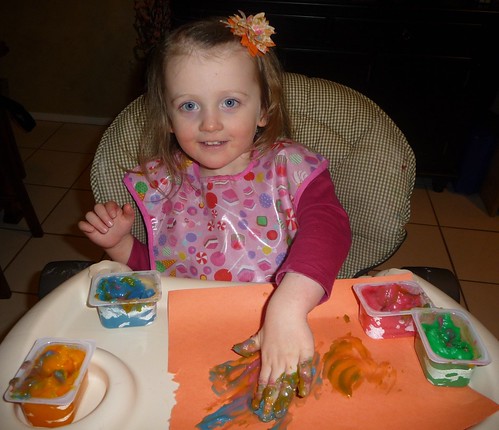
My toddler loves anything to do with drawing or art, and Finger Paints are a wonderful excuse to make an artistic mess…so naturally she is a fan! Hope you enjoy this Recipe for Finger Paint as much as we do!

~INGREDIENTS~
- 1/2 cup cornstarch
- 3 Tbsp. sugar
- 1/2 tsp. salt
- 2 cups cold water
- food coloring
~Directions For Finger Paint~
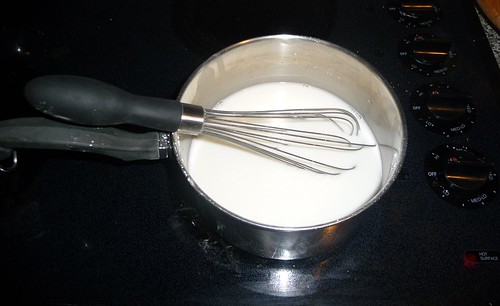
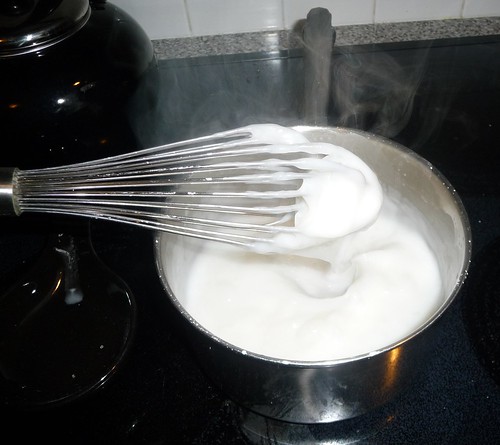
1) In a medium pan, mix all the ingredients together. Cook over low heat 10 to 15 minutes. It’s very important that you keep stirring the finger paint mixture until it the moment that it turns from thin – to thick. The picture above shows the ,mixture thin, and below in its thickened state.
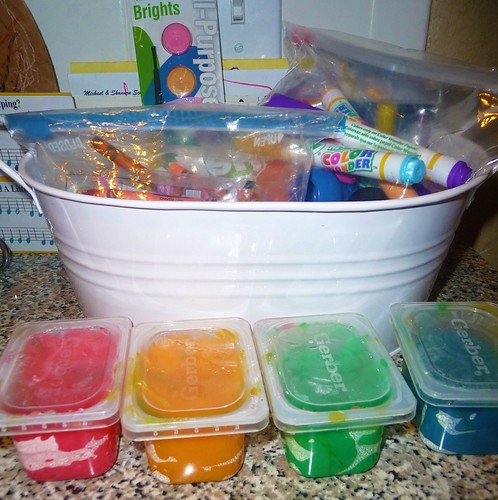
2) After the finger paint has thickened take the pan off the stove immediately, and let the mixture cool. I split the mixture in four different bowls to cool.
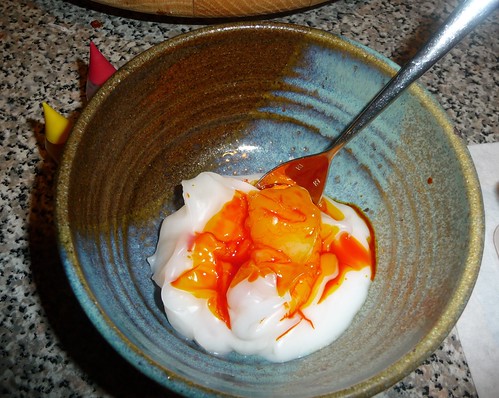
3) In each bowl, I used several drops of food coloring to create the primary colors. Be aware that if you want true red you will need to use extra drops of red in that bowl. Otherwise the red and white mixture will create a very vibrant pink. My toddler LOVED the pink color- so we kept it that shade:)
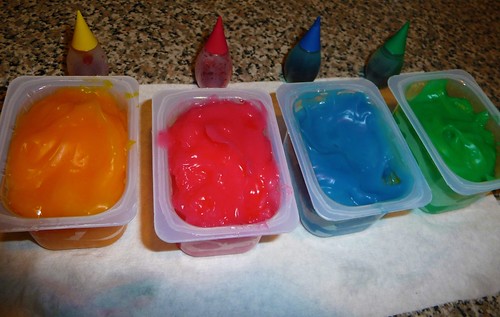
4) I used empty vegetable baby food containers to put the Finger Paint in. I recommend them because they come with tops, that are great for storage.
-Finger paint will keep in airtight container for about 3 days. After that the mixture will start to harden. And then it’s time to whip up another batch!
One of my favorite things about making your own Finger Paint is that you know what you put in it. It’s non toxic, and if a young child has a tendency to get their fingers in their mouths you know that they are not ingesting chemicals or anything not food grade. Plus its a great chance to talk about colors, learning the names as well as the colors that you can create by mixing primary colors together. Want to make other art supplies? What about making your own Play Dough or Watercolor Paints?
Enjoy! And remember this is the last week to enter the Potty Training Giveaway 🙂
Shannon traded in her sensible NYC TV producer shoes (they were best for taking the subway), for a pair of Texas Cowboy boots when she married her best friend! He's at fault for making this Yankee a Texan! Shannon writes about all things that make a house a home. Her chief blogging inspiration is being the proud & slightly neurotic mom of a preschool age daughter.
You can find Shannon on Facebook, Pinterest, Instagram and her new favorite place to hang out, Google+.


She looks like she is having such a good time. Love the bright colors.
@JDaniel4’s Mom, She LOVED it! And mommy kinda enjoyed making and mixing the colors too:)
cool! I am going to try this this week, since we are supposed to get ANOTHER snow storm here!
@Linds @ A Dollop of My Life, Oh goodness! We just had a snow/ice storm here last week- and were trapped inside all week! I feel for ya! At least if you have some fun activities to work on the time will go faster:)
Wow that is awesome! I want to make them:) and its great that they are nontoxic!
@Nikki, You should make them!!! They are WAY fun! You could make them for Elena!
I’m so excited to find this recipe! I especially love that it won’t hurt them if they taste it – my 20 month old is always wanting to paint like his brothers, but he still puts everything in his mouth!
@Sarah @ Frugal Fun for Boys, I hear ya! My 30 month old still cant resist putting stuff allover her face and mouth! It’s like a given:)
Love the name of your site- must come by and check out your ideas! No boys here, but do Tomboy toddlers count? 🙂
Thanks for this recipe! I plan to do this soon so my 2 little ones can do some fun painting!
Thank you Shannon! My girls would love this! I love how you re-used the Gerber containers too. They’re perfect! Jenn
Awesome! Thanks so much!
good idea and inexpensive to do with a child. the little one looks so happy. grammie
I just came across your site from twitter. This recipe looks great…and so easy! Only question is how washable is it? Will it stain clothes, table, etc.? Thanks so much!
@Patricia, Hey Patricia so glad you stopped by! The recipe is super easy- always a huge selling point for me;)
No- the finger paints are not prone to staining. You do need to make sure the food coloring you used is well mixed in the cornstarch mixture, and I’d let it sit for a minute or two after that to be sure the color is totally combined. We had no problems with the color staining- we just sprayed our toddlers hands off at the end and it came off easily. If finger paint gets on carpet- not sure how that would be to get out. I’d advise doing this craft on a floor that is wipable:)
Hope that helps?
This is on our list to do now!! Looks so much fun!! Kerri
That sounds easy and safe! I am definitely going to save this recipe. Just hopped over from the mom loop, so glad to have found your blog, it is lovely!
So excited to have found your site! I came over from the mom loop to visit! I am so excited about making this finger paint. My son is two and would LOVE this!!!! Hope you get a chance to check out my blog, too! Can’t wait to see what you had to say about the Superbowl in N.TX. My family is all over TX – Arlington, San Ant., Austin, McAllen, Houston. I grew up there! I have not checked, but am assuming you are somewhere in the area? I will definitely be checking back often!
Genius! I re-tweeted cause it’s a great idea!
Thanks for finding and sharing a recipe you love, along with the great photos! I just bookmarked your post. When there are a number of recipes for finger paint, it’s nice to know which ones really work well! I’m already a follower from Mom Loop.
What a great idea for a gift for a little one! My 8 year old will enjoy making this. THanks!
I never thought about making finger paints. I know my daughter will love it… And the fact that I know what is in it will be great if my son paints… He eats everything! LOL. Visiting from the Mom Loop.
What a neat idea! I like that it is non toxic too! visiting you from mom loop.
I am having a giveaway on my blog. Check it out!
http://houseonashwelllane.blogspot.com/2011/03/38-store-credit-free-shipping-giveaway.html
This is awesome, I am a home visiting nurse and my baboies will totally love this, we are your newest followers from blog frog thanks for sharing this tutorial!!!
This looks really fun! Thanks for sharing. I never knew you could make your own paint. Now my kids will get me busy!
Awesome tutorial! I am sharing this on my list of summer activities to do with your kids. 🙂
So easy. I love making things like this.
How creative! 🙂 I love things like making your own paint.
I just made these finger paints but once the mixture was divided into airtight containers ( baby food jars), I left it for a few hours and came back to a hardened jelly. What did I do wrong?
@Angie, Angie- the short answer is probably that you cooked it too long. Ya know how it starts to cook as a liquid? And then as it gets hot- all the sudden it congeals? You want to get it off the heat and add your dye at the first sign it’s getting jelly like. As it cools off it will congeal more. It will get hard if air gets to it over days- but if your got hard that fast- my guess is it just overcooked in the beginning. In the jelly state though- you can always wisk in more warm water to make it a thinner consistency! So that is totally fixable.
Also be aware that store bought finger paint tends to be much runnier- of course its mostly water. If you prefer that- wisk water in at the end to thinner. But I def prefer home made to have some texture, and to spread like warm butter:)
Hope that helped?
Nice tutorial! We are going to use this later today to make some thanksgiving finger paint placecards! Just a comment about the toxicity/chemical ingedients. You might want to check your food coloring… Most are chemicals some of which are known carcinogens. Namely red dye. They aren’t easy to find, but you can buy some dyes that are made out food (beets, turmeric, carrots, etc…). A much safer alternative… Or even make your own (beets, coffee, turmeric, carrots, etc…).
Loved this! We just made it this evening, and my toddler son came up with all sorts of bloppy bright pretty pictures for me!
@Joy, He made pictures for you?!? That is SO SO SWEET!Yay!
@MilkandCuddles,
Yep he sure did enjoy himself! Thanks for the great recipe!
Oh I just love your educational resources! I would love for you to share your stuff on my site via my weekly homeschooling on the cheap linky: http://3boysandadog.com/deals/2012/homeschooling-on-the-cheap-january-12-2012/
Thanks for the recipe. Making it now. Still stirring almost 30 min and no signs of congealing. It is on low heat and I have been stirring practically non-stop. Any thoughts?
@g33klvr, Perhaps your heat is too low? In the picture above you can see steam coming off mine, I’m gonna guess its not quite getting hot enough. Also be sure you didnt leave any ingredient out. But if not- I think you need a bit more heat. I do remember mine looking like it wouldn’t congeal- and then it just did. Hope that helps! let me know how it goes when you try that!
@g33klvr,
Same here! It took longer than 10-15 minutes. I eventually turned the heat to medium, but overall time was definitely more like 30 minutes.
just wondering, if it’s edible, can it be used for painting cookies?
@eva, Hey Eva- it could be….but its meant to be a gloppy thick texture as finger paint usually is – which is not really ideal for painting on something like a cookie. It also is not flavored or sweetened, so it’s not going to have a great taste like frosting with food coloring would. It wont hurt a kiddo to nibble this- but its not really meant to be a meal;)
Hope that helps!
@Shannon Schmid,
i made it and it actually resembles frosting a lot, except it tastes gross. maybe i did something wrong but it was very hard to paint with and when it dried the whole page crumbled up. at least the kids enjoyed getting messy!
How long does it take to dry? I am going to use the fingerpaints to put my daughters handprints in our Christmas cards..
@beth, It depends on how thickly you coat her hands! Also keep in mind that just like traditional finger paint, it comes out better on paper meant for finger paint(remember that shiny paper from preschool?) And if its done very thickly, it will get a crackly appearance after it dries:)
This design is spectacular! You definitely know how to
keep a reader amused. Between your wit and your videos, I was almost
moved to start my own blog (well, almost…HaHa!) Fantastic
job. I really loved what you had to say, and more than that, how
you presented it. Too cool!
Mine will not thicken no matter what I do.
This looks great except for the food coloring – that is very toxic and dangerous for kids, or anyone! So it’s definitely not edible! Be sure to use natural, food based coloring. They can be found online or in health food stores.
You can make use of flax meal, almond meal, soy powder, etc.
I attempted to make this at one point it didn’t do like it should have.