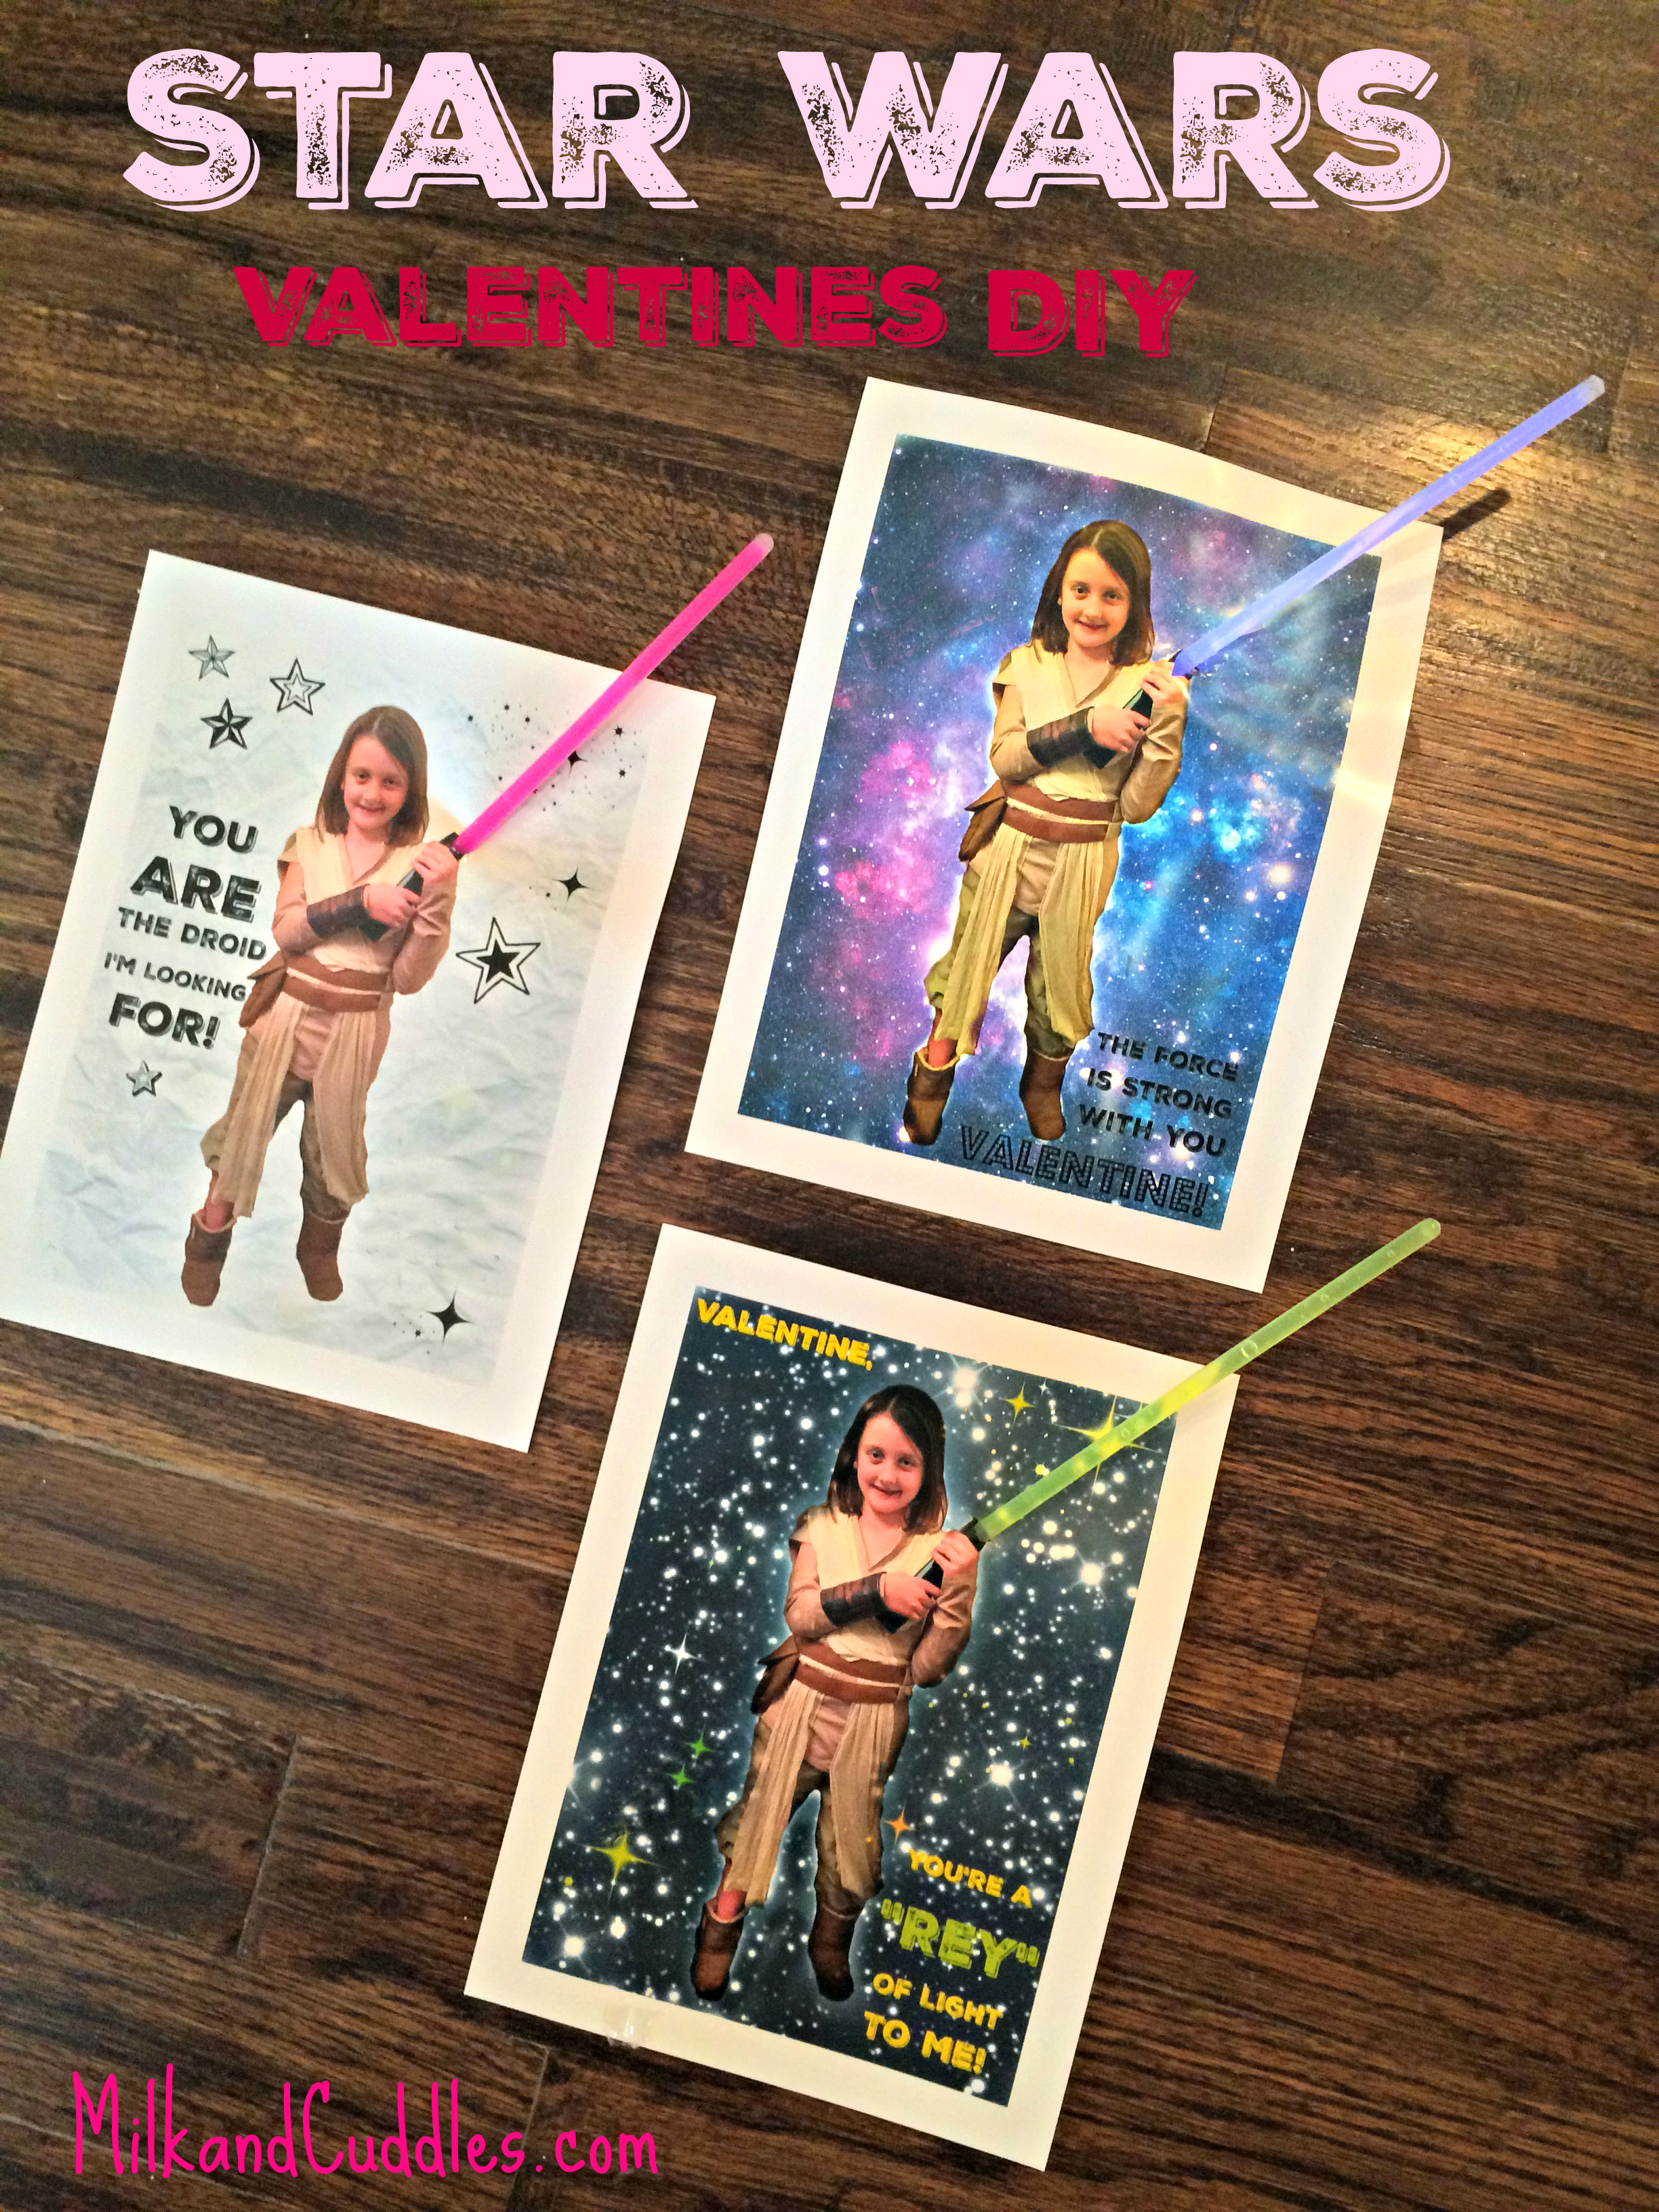
Our family really enjoyed the latest Star Wars movie – it was so sentimental and fun for my husband and I to introduce Star Wars to our daughter! And I can’t tell you how happy it made me as a mom to see a female lead! Rey became a family favorite instantly, and my daughter immediately asked for class Valentine cards featuring Star Wars. When I didn’t find any in the stores that I loved – we decided to let my daughter play Rey, and to make our own Star Wars Valentine! Making Star Wars Valentines is easy.
Here is how we did it!
Making a fun Galactic Background for your Star Wars Valentine:
1. Take a photo of your child in whatever Star Wars Costume or look they want. Try to take the photo from their eye level so it’s straight on. They can pretend to hold a light saber, but if you want it to look like it has the black bottom try having them hold a household object like a flashlight! We used a black remote control below!
If you can find a completely blank wall, you can skip straight to step 3! If not, no worries!

– You can use any photo editing program you like, but I prefer simple – so I use PicMonkey (Affiliate Link) If you don’t have the paid version, you can use the free version for some effects, or try the the paid version for a month free. I opened up the “design” feature on PicMonkey, and chose white as my canvas color. Then I went to menu on the left and chose “overlays.” At the top of overlays, I clicked on “your own” and chose the original photo from my computer. I sized it by moving it up and down, and then clicked the right tab on the pop up menu and selected the “eraser”‘ option.
2. Using the eraser, I chose the size brush I wanted and began to get rid of the original photo background. I used a small eraser for spots close to my daughter, and a larger size for areas that had no detail to avoid erasing. Eventually I was left with a photo of just my daughter superimposed on my chosen white background.
-If you make a mistake and erase something you meant to keep, no problem! Just click the “undo” button on the top of your PicMonkey screen!

3. Now comes the fun part! You can use any background or effect in the same way you erased your original background. I chose two of the “space” backgrounds by clicking the “texture” tab on the left. Then on another Valentine I thought I’d try a crumpled “paper” background by clicking that tab (also on the left).
Want to add some fun graphics or sayings on your Valentine? Just save your background work, and then click edit! Now you can add words to your card. Here are a few suggestions…
Some Fun Star Wars Word Play:
You’re such a “Rebel!”
I “Chewy” You!
I like you “Sith” much!
You hold the “Woo-KEY” to my heart!
“Yoda” one for me!
May the “Force” be with you Valentine!
I heard there was a “Bounty” on your heart!
I “Chew’se” you!
You’re the “Droid” for me!
Valentine, you’re a “Rey” of light to me!
Don’t close the “blast doors” to your heart!
Our love will “Endor!”
The “Force” is strong with you Valentine!
Valentine, You’re a “Trooper!”
You “R2” good to me, Valentine!
Word play is easy using Star Wars places and names, so be creative and come up with a few of your own! It’s a lot of fun!
Completing Your Valentine:
You could certainly print your valentines out and use them just as they are. But for an extra pop – I found some small glow sticks to thread into to Valentine Card, and to act as a glowing light saber! Its easy to place them in just use an exacto knife to make a tiny opening.
Hope these tips help you to create fun Valentines Day Cards this year – and for years to come!
Looking for other Space Age Crafts? Check out this Galaxy Shirt, for another Star Wars inspired project!

Shannon traded in her sensible NYC TV producer shoes (they were best for taking the subway), for a pair of Texas Cowboy boots when she married her best friend! He's at fault for making this Yankee a Texan! Shannon writes about all things that make a house a home. Her chief blogging inspiration is being the proud & slightly neurotic mom of a preschool age daughter.
You can find Shannon on Facebook, Pinterest, Instagram and her new favorite place to hang out, Google+.


So darn cute and clever!