
You will need:
- A medium sized wire wreath form (I got mine at Michael’s craft store)
- 2 rolls of burlap runners ( 5yds. each)
- Ribbon to make a bow (or a pre-made one)
- Some fun decorations. (I used a tube of foam glitter hearts)
- pipe cleaners or twine
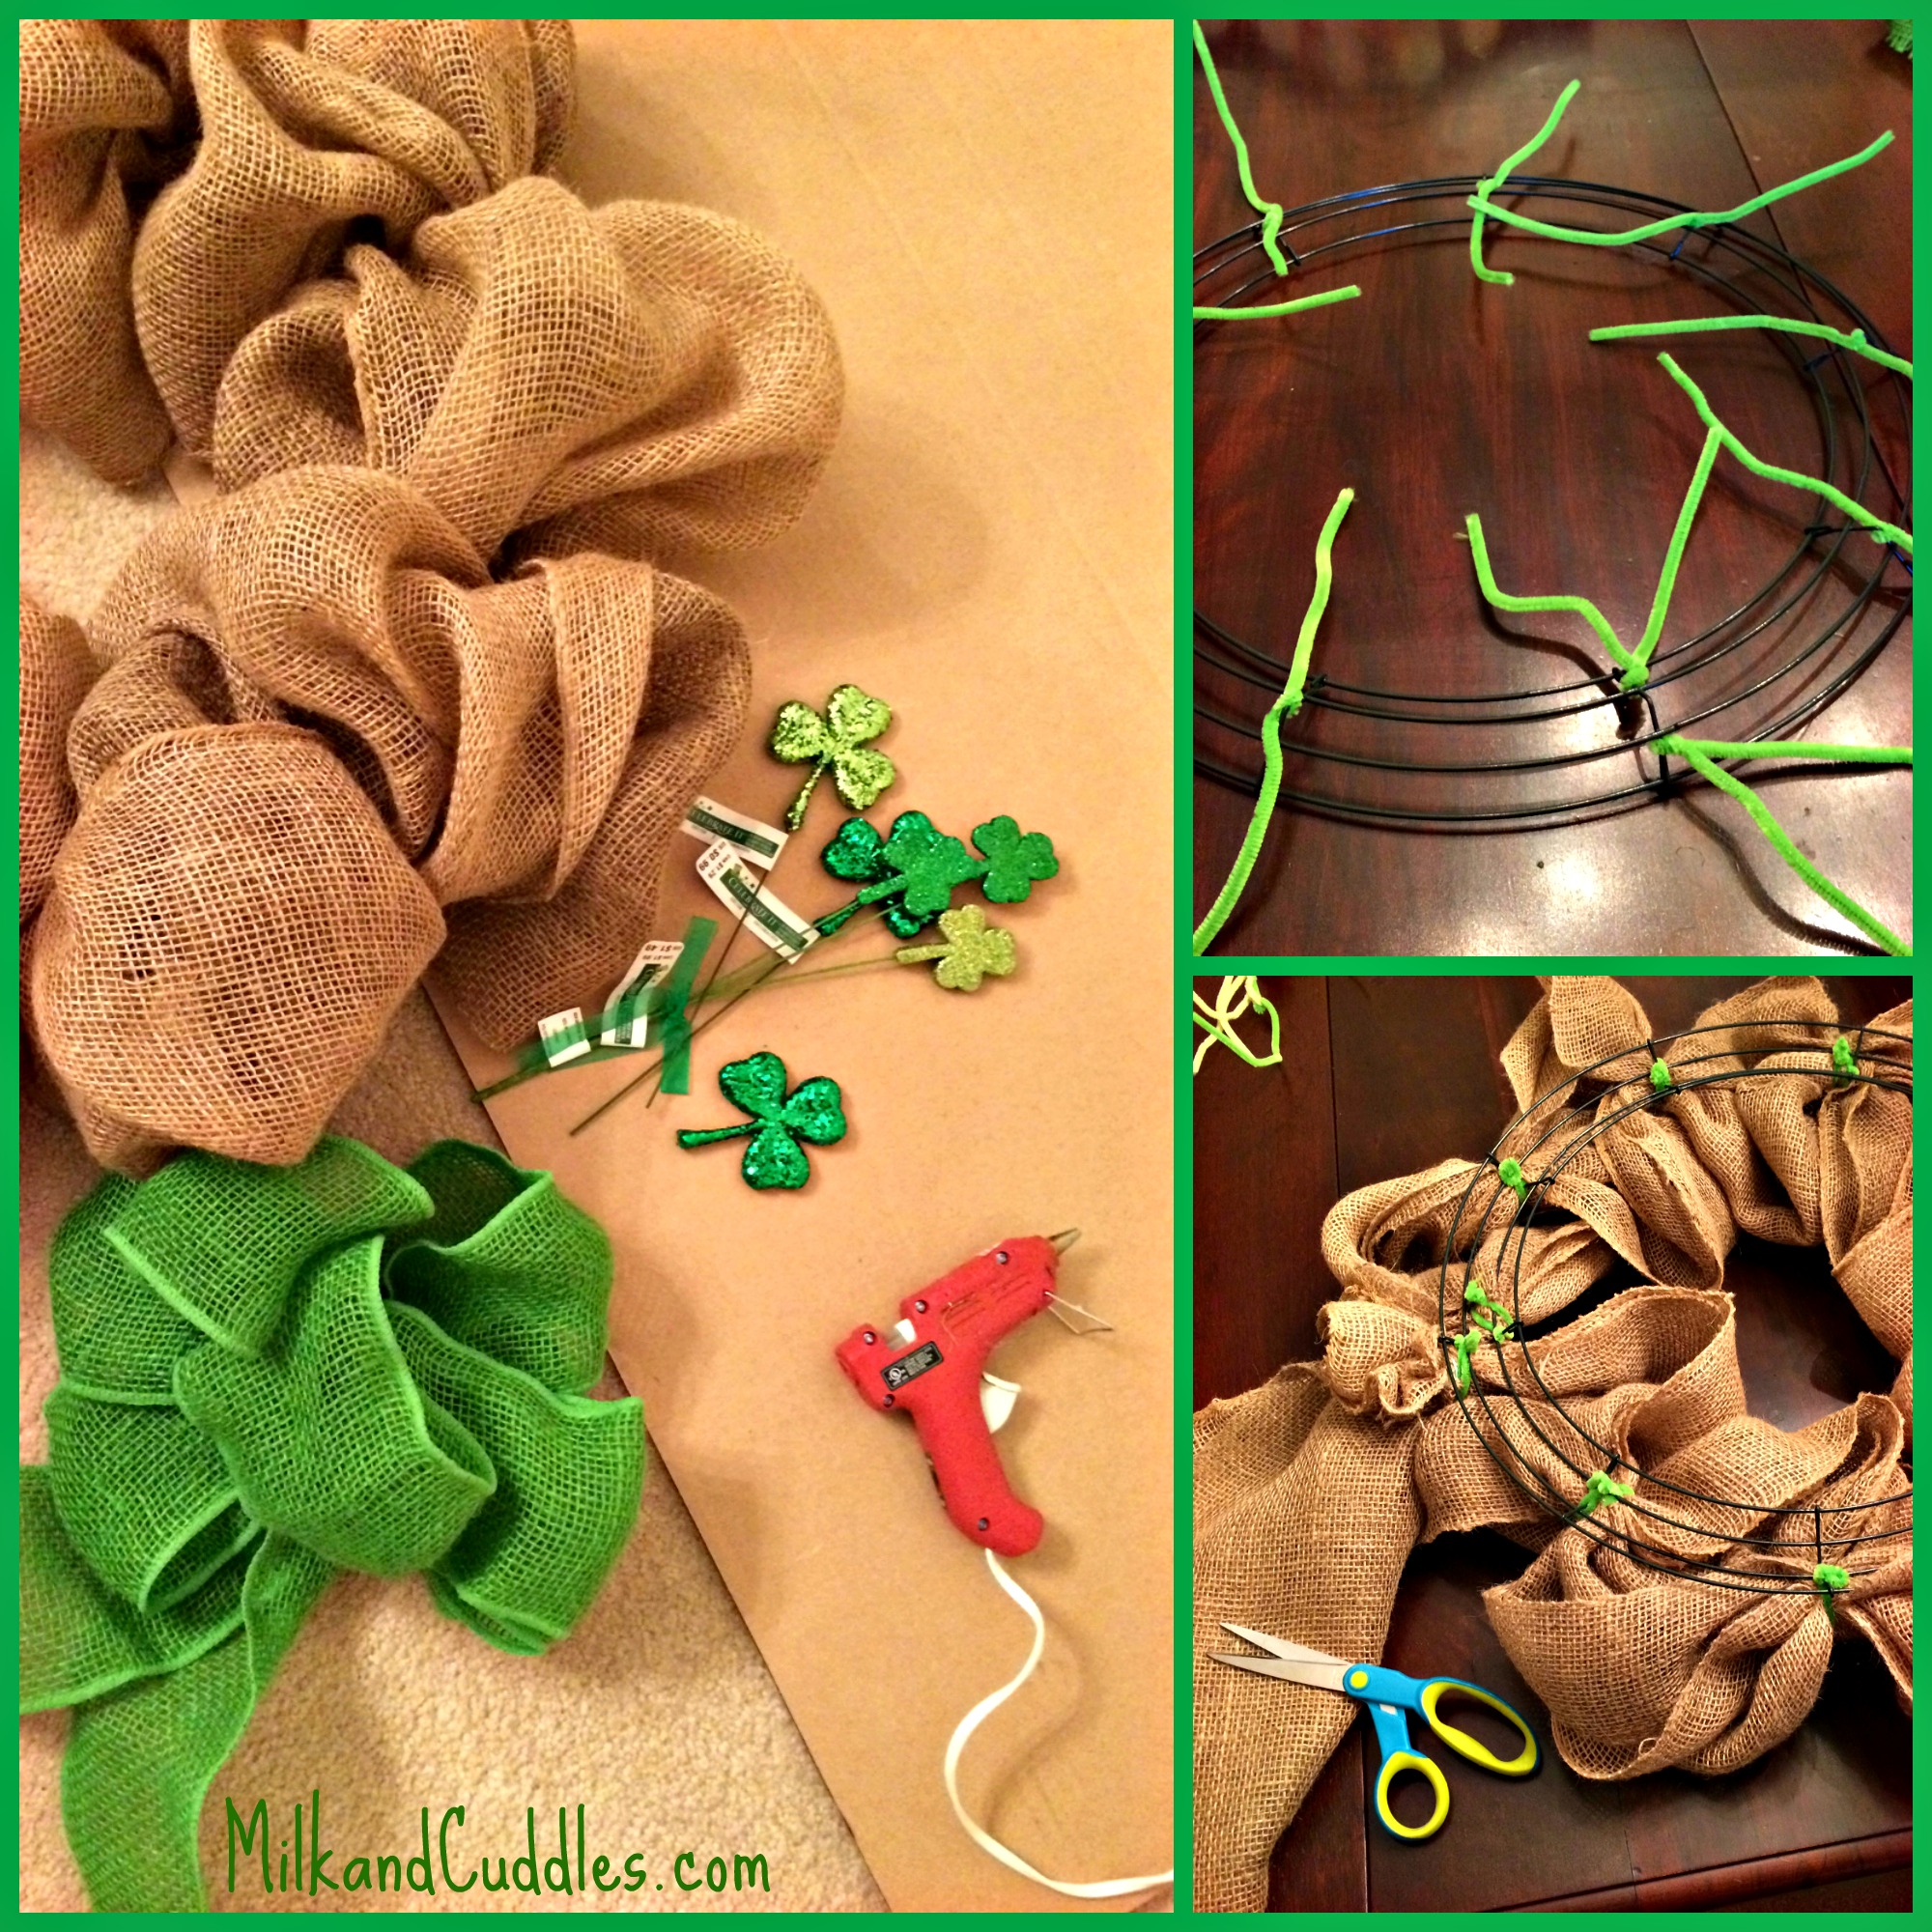
Burlap Wreath Directions:
1. Take pipe cleaners and twist them on your wreath form. On the medium sized form I used they had wire that went vertically about every 4 inches, and I used that to secure my pipe cleaners.
2. Next unroll both burlap runners, and placed one on top of the other. Gather the end of the burlap and secured with a pipe cleaner, tying it underneath the wreath securely. You can use twine, but pipe cleaners are much easier to work with.
3. Next, create a loop of burlap to the next pipe cleaner, and secure it. In this case, I made each loop roughly two fists high. The higher you make the loop, the more relaxed and flowy the burlap wreath will be. The closer and shorter the loops are – the more controlled looking the wreath will be.
4. Once you work your way around the form making and securing the loops, you will want to cut the excess burlap off your roll and tuck in the ends so they are behind the wreath form.
5. This part is optional, but the wreath looks a bit nicer if at this point you go around to each “loop” you made and pull the under burlap piece to the side. Alternating pulling the top burlap to one side and the under to the opposite side. Then just fluff up the rest to your liking.
6. Use a glue gun to secure your top bow (or another pipe cleaner). And glue whatever festive ornaments you have all around the wreath!
I think the end result is a fun shabby chic wreath! The burlap makes a big statement!
Here is a video showing just how I made the burlap wreath…
Other St. Patrick’s Day Activities:
St. Patrick’s Day Play Dough Activities
Make your own Green Flowers Experiment
Shannon traded in her sensible NYC TV producer shoes (they were best for taking the subway), for a pair of Texas Cowboy boots when she married her best friend! He's at fault for making this Yankee a Texan! Shannon writes about all things that make a house a home. Her chief blogging inspiration is being the proud & slightly neurotic mom of a preschool age daughter.
You can find Shannon on Facebook, Pinterest, Instagram and her new favorite place to hang out, Google+.


So cute – just pinned!!!
This is gorgeous! Pinned!
This is a great tutorial – thanks for sharing!!