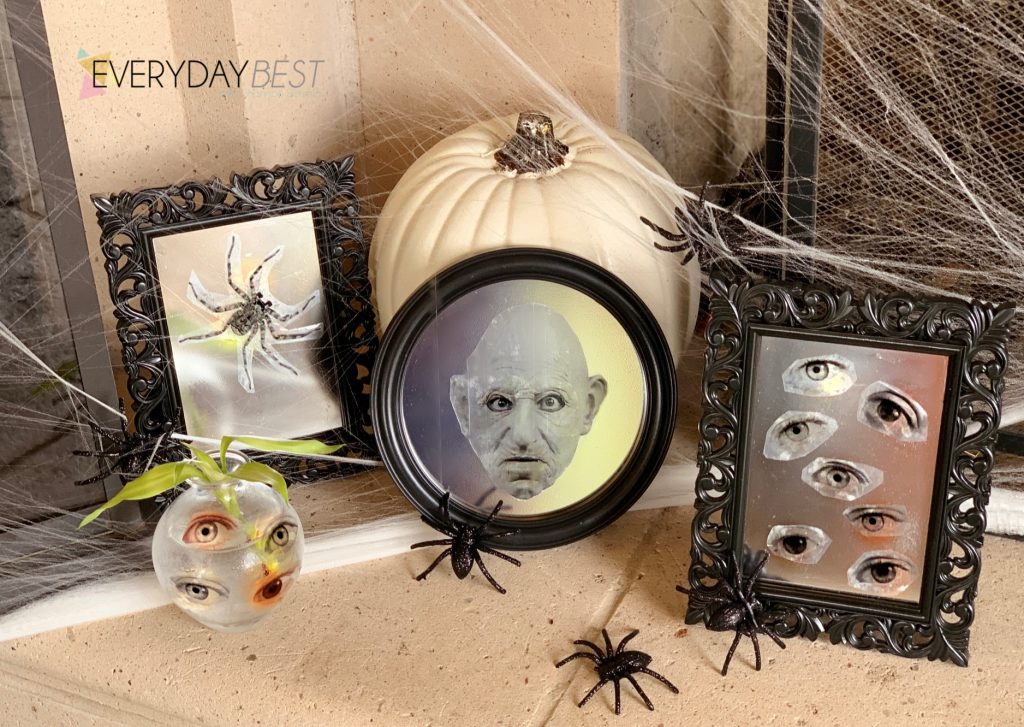
Want to make some totally unique to you, spooky decor? These crafts make the perfect haunted house props or party decor! And because you can use any image you want – you can fully customize these for any style of Halloween decor you’d like! I love the idea of using this project to make spooky mirrors or framed photos as haunted house props – but also just for some fun fall atmosphere!
Here is what you will need to get started on the project…
What You Need:
- An image, that you printed out. Black & White works best.
- Clear packing tape
- Bowl of Water
- Modge Podge (optional)
- Find your image of choice – First, you will want to find an image you like. Maybe it’s yourself with scary makeup, maybe its a ghostly doll. Whatever it is, you will want to note that once it becomes black and white – the white portions will become totally see through. So try to find an image that has a fair amount of dark spots that will show up. For instance, someone in a wedding dress would look like just a face once this craft is done, since the white dress would mostly disappear in the finished product. Color copies work too, but are not as translucent.

Print your image out on regular printer paper, in black & white. You will need this to be a laser copy. Please note: inkjet printers wont work for this craft. If thats the kind of printer you have, send your image to a copy shop like Staples or Fed-ex. Their printers are almost always laser. And work great.
2. Cover it with packing tape – Next, you will want to cover your image completely in clear packing tape. The wider the tape the better. If your image is too wide for a single ribbon of tape- you can overlap tape to cover a wider surface. Press down to be sure your image is totally adhering to the tape- and you see no air bubbles.
3. Submerge in a bowl of water – Trim your image, and then plunge it into a bowl of water. Give it a few minutes to soften.
4. Rub off Paper backing – At this point, the paper backing on your image will be feeling pretty soft and pulpy. Gently use the pads of your finger tips in a smudging motion – and the paper will peel off. You may need to rinse your water if it gets too cloudy with paper pulp.
Once you you have gotten the paper backing totally off – your image should look translucent except for the places where the tape held on to the black laser ink!
Great Job! Now you’re ready to add the image to your project!

Adhere to your project – You might be surprised to note that your tape thats been in a bowl of water is still quite sticky! If you put it on a mirror or glass wet, and smooth out and water bubbles it will dry quite well in place. Want to move it later – just peel it off and re-wet! Need it to stay on something permanently? Then use some modge podge!
Want to watch the process? Check out this quick video that shows each step…
Can think of a million uses for these sticky images?! I know I can’t stop thinking of ideas! Spooky mirrors, decorations for vases, personalizing a candle. The possibilities are endless! And if you are using this craft to help you decorate for a Halloween party, you might want to check out these fall party ideas too…


Shannon traded in her sensible NYC TV producer shoes (they were best for taking the subway), for a pair of Texas Cowboy boots when she married her best friend! He's at fault for making this Yankee a Texan! Shannon writes about all things that make a house a home. Her chief blogging inspiration is being the proud & slightly neurotic mom of a preschool age daughter.
You can find Shannon on Facebook, Pinterest, Instagram and her new favorite place to hang out, Google+.


[…] Haunted House Props […]